情景
如果我们没有自己域名,在外网也没有服务器,我们能建自己的博客让外网的用户访问吗?答案是肯定的。那就是利用github提供的静态网站解释服务,将本地的博客上传到github上,搭建自己的外网博客。
实现
注册github帐号
首先要有一个github帐号。先访问 github 注册页面,填写用户名,邮箱和密码进行注册登录。
创建项目
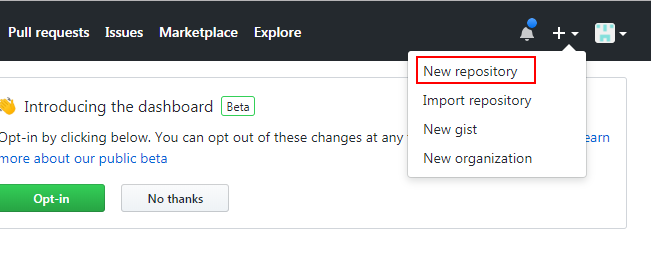
登录后,点击在右上角的加号,选择New repository新建一个项目。
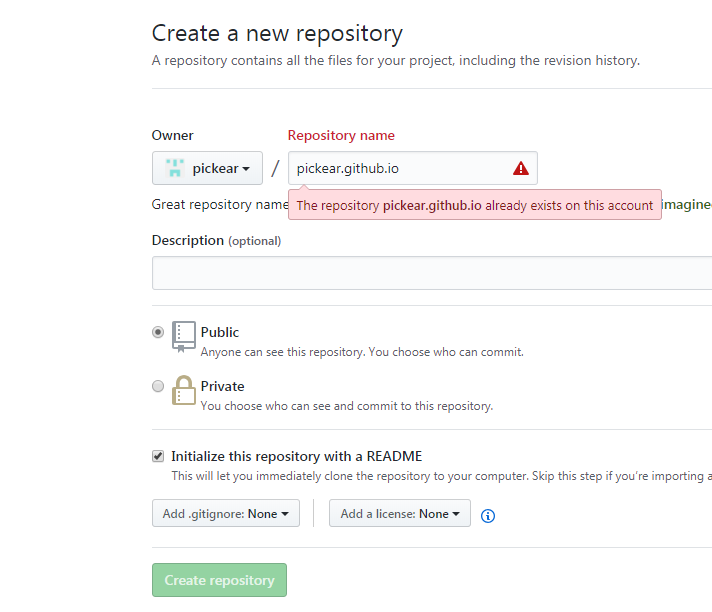
如下图,填写项目的资料。项目名固定为xxx.github.io,其中xxx为你在github上的用户名:
- 安装上传插件
1 | npm install hexo-deployer-git --save |
- 设置github帐号到本地
如果没有设置,上传过程可能会再现”error src refspec HEAD does not match any”
1 | git config --global user.email "pickear@gmail.com" |
- 通过ssh方式上传
- 创建publickey
如果没有创建publickey上传到github,可能会出来”Permission denied (publickey)”。
1 | ssh-keygen -t rsa -b 4096 -C "pickear@gmail.com" |
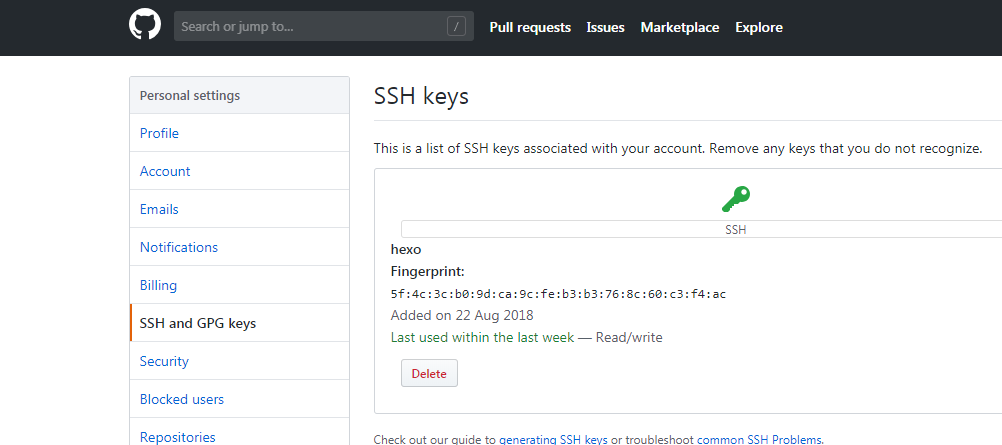
此时在/user_id/.ssh生成两个key文件,将id_rsa.pub里面的内容,复制到 github 上保存。
- 配置ssh地址
编辑Hexo配置文件(_config.yml),找到deploy,改为以下内容:1
2
3
4deploy:
type: git
repository: git@github.com:pickear/pickear.github.io.git
branch: master - deploy到github
1 | hexo d ##d等同于deploy |
- 通过https方式上传
编辑Hexo配置文件(_config.yml),找到deploy,改为以下内容:
1 | deploy: |
deploy到github
1 | hexo d ##d等同于deploy |
如果通过https方式上传失败,请使用ssh方式或通过git工具命令上传。